How to Setup your Smart Wi-Fi Indoor Camera as a Webcam

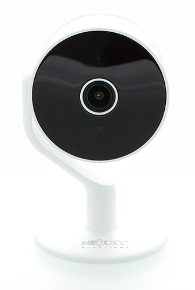
This article will explain how to setup your Smart Wi-Fi camera Indoor as a webcam
(Only for models AHIMPFI4U1, NHC-I720)

Note: Please read carefully the Procedure, and make sure the firmware you are about to use is the correct one for the version of the camera you have.
What you need
  • The Nexxt Solutions Wi-Fi smart camera (Only for models AHIMPFI4U1, NHC-I720)
  • Nexxt Solutions’ webcam firmware (downloadable)
  • A microSD card (user supplied. Max capacity128MB)
  • A USB to microUSB data cable (user supplied. The cable provided with the camera is only for power)
  • A headset or headphones for audio with built-in microphone or external microphone (user supplied)
  • Check the firmware version before updating the camera to webcam.
  • If the version is V2.4.6 then use the V2.4.6
  • If the version is V1.1.12 then use the V1.1.12
Before you start
  • This solution is an alternative for using the Wi-Fi indoor camera as a webcam. The warranty will be void if the camera is damaged or malfunctions as a result of this firmware update.
  • Once the Wi-Fi camera is updated using the webcam firmware, it will not be able to transmit audio and smart features will be disabled. You must use the computer's audio and microphone or a headset for two-way audio.
  • This may or may not be compatible with your computer operating system. Test the device to make sure it is supported by the computer platform you are using.
  • This solution has been tested and works with Zoom, Teams, and Skype.
How to check your Wi-Fi Camera Version

How to update your Wi-Fi camera to a webcam

1. Download the webcam’s firmware to your desktop from this link:

2. Insert the microSD card into your computer.
3. The microSD card must be formatted to FAT32 before copying the firmware file. Open File Explorer and locate the drive letter for your SD card. Right-click the drive and select Format.


4. Select FAT32 from the File System drop down menu. Make sure Quick format is selected and press Start to begin.


5. A warning will advise that all data on the microSD drive will be erased. If there is sensitive information on the microSD card then backup the information before proceeding to format and erase. Select OK to proceed.


6. Copy the firmware file from the desktop into the microSD card.
7. In File Explorer, right-click on the microSD drive and select eject. Proceed to removing the microSD card from your computer.


8. Insert your microSD card into the memory slot of the camera.


9. Press and hold the Reset button. Plug the camera onto the computer using the user supplied USB cable to turn it on.


10. Continue holding the Reset button for 3-5 seconds until the light in the front of the camera turns solid green, then release the button. The camera is now in the firmware update process, wait approximately 30 seconds until the status LED begins to blink.


11. Once the firmware update is complete, the green LED light will change to red indicating that the update process has been completed.


12. Unplug the Wi-Fi camera from the power source to reboot. Remove the microSD card from the camera.

How to revert the webcam back to Wi-Fi Camera Security

1. Download the Smart Wi-Fi camera firmware to your desktop from this link:

2. Insert the microSD card into your computer.
3. The microSD card must be formatted to FAT32 before copying the firmware file. Follow the steps from the prior section on how to format the microSD card.
4. Copy the firmware file from the desktop into the microSD card.
5. In File Explorer, right-click on th microSD drive and select eject. Proceed to removing the microSD card from your computer.
6. Insert your microSD card into the memory slot of the camera.


7. Press and hold the Reset button. Plug the camera onto the computer using the user supplied USB cable to turn it on.


8. Continue holding the Reset button for 3-5 seconds until the light in the front of the camera turns solid green, then release the button. The camera is now in the firmware update process, wait approximately 30 seconds until the status LED begins to blink.


9. Once the firmware update is complete, the green LED light will change to red, indicating that the update process has been completed.


10. Unplug the Wi-Fi camera from the power source to reboot. Remove the microSD card from the camera.

Here you can see a process on how to do it