
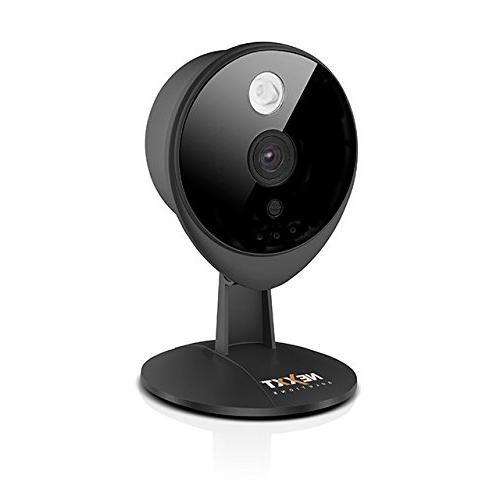
Thank you for purchasing our product. We are glad to be with you.
Below you will find the steps to add the camera via cable.
The App you will use with the cameras is called: XPY Guard.
Also, you can download the App from the following stores:

You may find the following screenshot depending on your phone OS

Note: Please before to do any of the following steps, reset the camera for about 35 seconds to have a clean configuration.
1. Disconnect all cables from the camera.
2. Take the Ethernet cable that comes with your camera. Connect one end to your router and the other end to the camera.
3. Connect the power supply, after 60 seconds wait until both LEDs (blue and orange) are steady. When this happens your camera is ready for be paired with the App.
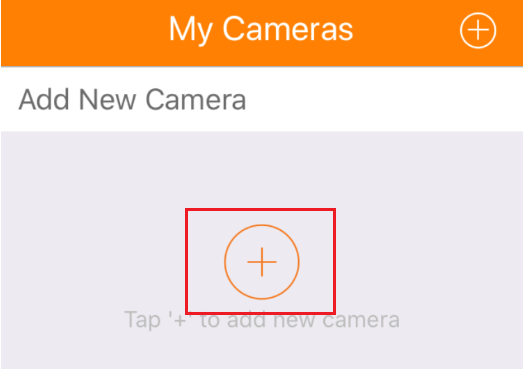
4. Open the App XPY Guard in the main screen tap the plus symbol "+" button to add a new camera.
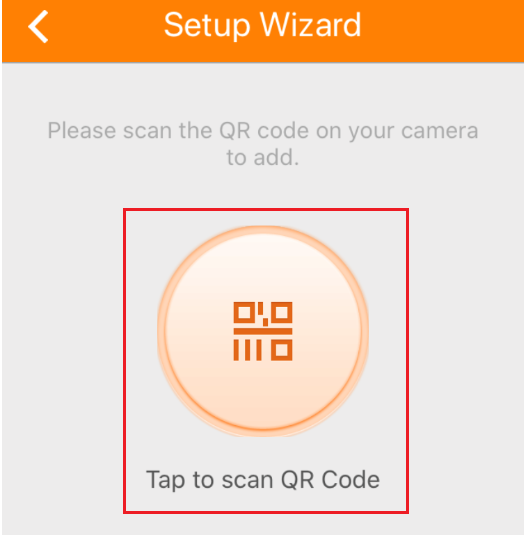
5. Tap to scan QR Code button.
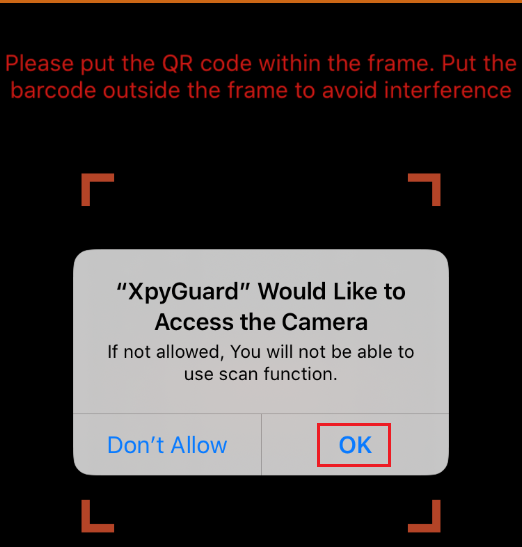
6. Allow access to the App to use your smart phone camera.
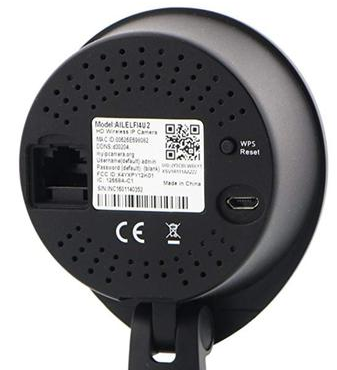
7. Then turn around the camera, and scan the QR code on the back of it.
8. Once you hear the tone the wired connection will be done successfully.
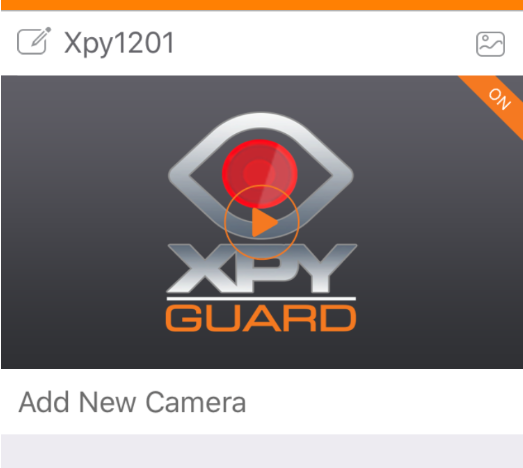
9. You will see the camera as been added to your App. Select the camera
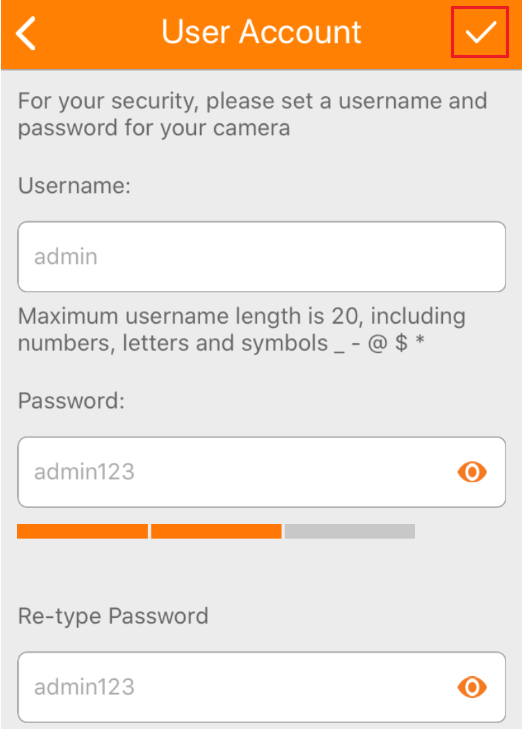
10. Once you have selected the camera, it will prompt you to add your Username, Password, and Confirm your password proceed to fill all these requirements, at the end press the "Play" button to continue.
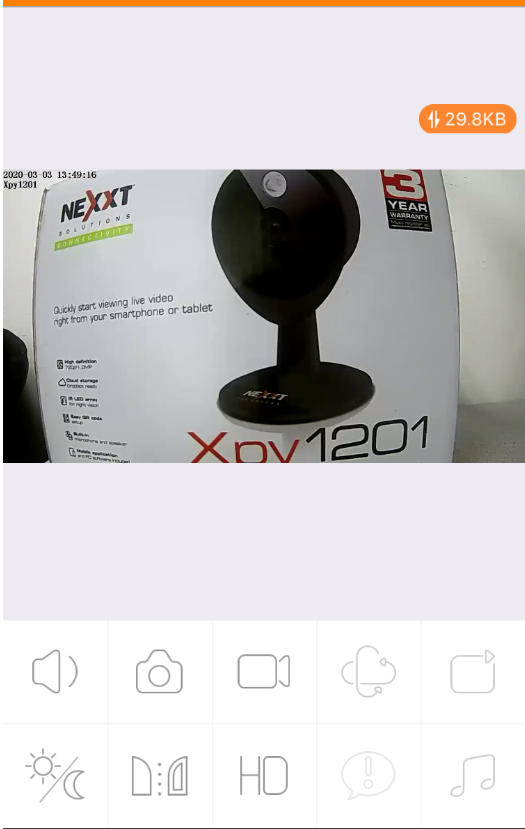
11. And you should be able to start seeing live video in your App from your new camera.
Note: For this configuration you need to have done the Step #1 settings.
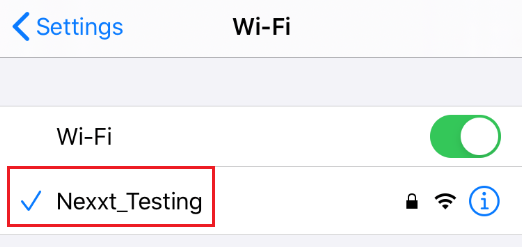
1. Go to you Wireless Network settings on your iOS phone or Android, and make sure your phone is connected to the same network your camera is connected via cable.
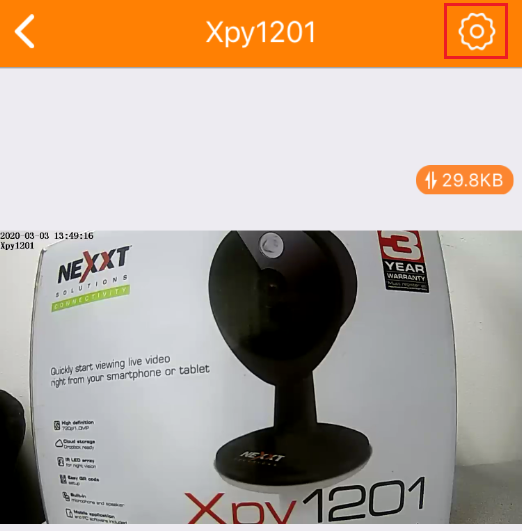
2. Open the App again, select the camera, then select the settings button on the top right. Looks like a gear wheel.
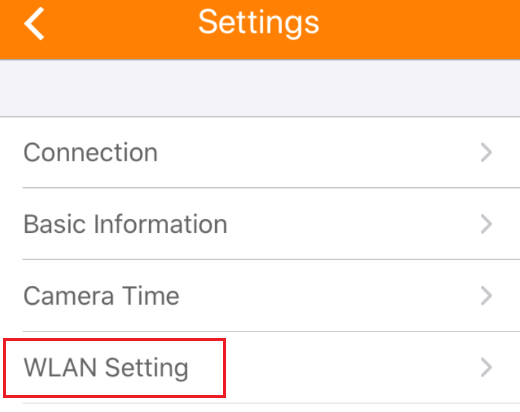
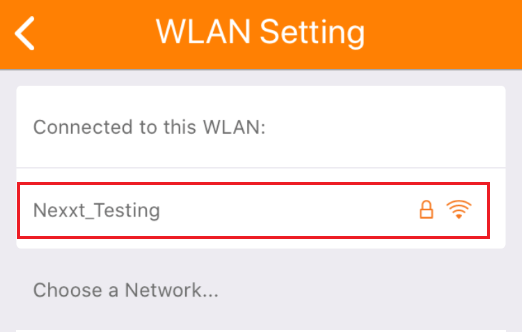
3. Select the WLAN Settings option
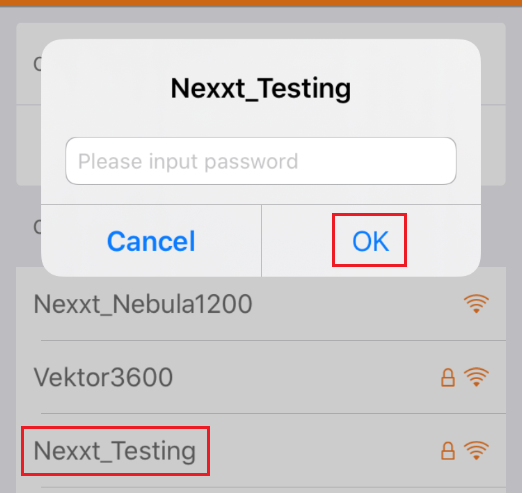
4. Choose from the list of wireless signal the one you want the camera to connect.
5. And it will prompt you to add the password of the selected wireless.
6. If all is done correctly, you will see a message that the settings was done correctly and you will see an image that says Connected to this WALN
7. Proceed to unplug the camera from the Ethernet cable on the back, wait for about 60 seconds. Then close the App and open it again.
8. Once open select the camera and you should be able to see live video from the camera once more, only this time your camera is connected wirelessly.